Several guides will assist you in pairing up your XR-15 remote to the sounder, but here is one of the most comprehensive overviews for your help.
Before getting into the procedural detail about; how to pair the XR-15 remote to the Soundbar? It is better to go through the aspects of whether it is possible or not because there have been various versions that came across by the programming of both devices.
So you might be confused about whether their pairing or programming is worthy or not? XR-15 falls in the category of the Xfinity remotes, and all the devices of this category can easily be paired with the audio receiver devices that, most importantly, include Soundbar.
For all this, you have to be sure through the step-by-step procedure because the variants have a bit of change. For this need of the users, here we are providing the programming steps of the XR-15 with the Soundbar.
For a detailed analysis, go through the facts provided below:
How to Pair XR15 Remote to Soundbar?
Both the devices are easy to make a connection because their interfacial working is very concise and comprehensive. Most of the Xfinity version gets connected, paired, and programmed similarly. But there can be a bit of change in their procedure that only belongs to the keys.
While dealing with the pairing connection of XR-15, you will do similar things as before the later versions. You do not have to pass by any rough, challenging procedure. Follow the provided simple steps or guidelines, which will clear your thoughts about; How to Pair XR-15 Remote to Soundbar?
Follow the given simple 6-steps to have the precise connection between your XR-15 remote and the Soundbar.
1. Receiver Output – Soundbar
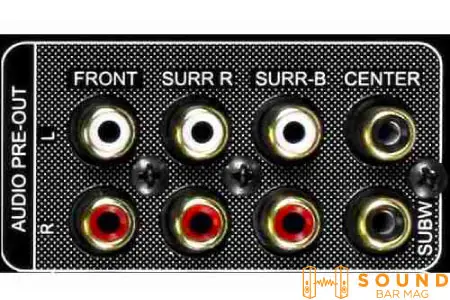
Before initiating any connection, it is worth ensuring that the Soundbar audio device is the receiver output of your sound. Otherwise, you will not be able to create default changes. In this case, if you can not set up the default setting of the speaker with the TV, the pairing would be useless and does not ensure the correct output.
For this, you should have a stable bonding between your TV and Soundbar. The connection could stand out with the help of an optical cable or HDMI ARC cable. This would also relate to your sound preferences.
2. Setup Button Activity
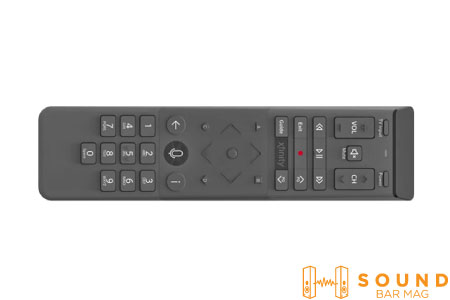
Once you are sure that the TV and Soundbar have been connected effectively through the optical cable, it would smoothen the path for further proceeding. Hold the key A and D for a few seconds for the setup initiation. These few minutes will provide an actual pairing connection between both reliable devices.
3. Wait for the LED Lights
After pressing the A and D for a few seconds, the setup starts responding. Hold it until complete conformity. It will provide an apparent sign of confirmation. The LED lights will begin showing the variation when the proper setup process is initialized.
For the LED lights, the red light will switch to the green color lights. Whereas for the remote responding behavior, wherever you press any of the buttons on the remote, it will light up a silver color blinking light at the top of your remote.
4. Enter Your Manufacturing Code
Furthermore, after the explicit confirmation of the setup initiation, it is time to add or enter your manufacturing code for further proceeding—the manufacturing code consists of the 5-digit numbers. You will enter your code by merely pressing the buttons of the remote.
Most of the time, if you cannot find your manufacturing code, start looking for it. For this, you should look online. If not, then you can also use another method, which is the Xfinity searching feature. It would be helpful as it provides a further bunch mark to the pairing proceeding.
5. Wait for the LED Lights (Again Switching)
After entering the 5-digit manufacturing number with the help of a remote, the LED light, which is confined at the top, will blink twice. And this was blinking and flashing of the light indicator that you have done almost 90% in pairing activity. No, it’s time to check whether the connection works for real or not.
Read also: Samsung Soundbar Keeps Switching to TV Speakers
6. Remote Testing
Once you notice the double flashing of LED light at the top side of your remote, it is the best time to test your remote or Soundbar pairing. Before that, it is better to check out the volume changes and power connectivities.
This direction will help tell you that your XR-15 remote is working effectively for your TV. By connecting it with the Soundbar, your remote will require a different level of manual adjustments because soundbars are a set of speakers with their settings. It got connected by your remote Xfinity device by default.
Read also: Samsung Sound Bar Volume Problems [Complete Guide]
What to Do When the XR-15 Remote is Unable to Connect with Soundbar?
In case the devices cannot connect, the earliest thing to test if you can’t get your XR-15 remote modified to your Soundbar is to press the code 9-9-2 and afterward hold the Channel Up button for as long as 3 minutes until the Soundbar turns on. Then, at that point, reinitiate the programming steps.
Know that this strategy can seem like it always takes as the remote resets to have the option to perceive your Soundbar. If you have not seen that your Soundbar has turned on while squeezing the code and holding the Channel Up button for something like 3 minutes continuously, then you should attempt another arrangement.
Read also: Why My Samsung Subwoofer Keeps Blinking Blue
Conclusion
Ideally, you won’t have any issues making a reliable connection after following the above mentioned steps. In any case, if this still hits you, you have to try out different arrangements. Just be optimistic about going ahead, as this unusual dissatisfaction in programming your Xfinity remote to your Soundbar is temporary and will cover up all your disappointment after you have succeeded in making a reliable connection.
Give the content a read to fulfill your volume requirements and if you find any uncertainty in connecting both devices.
Related Posts:
- How to Program Dish Remote to Soundbar? [Steps]
- How to Program Xfinity Remote to Soundbar
- How to Turn On Bose Solo 5 without Remote – Alternative Ways
- How to Fix Samsung Soundbar Remote Not Working Issue?
- 3 Samsung Soundbar Replacement Remote Options [GUIDE]
- VIZIO Soundbar Remote Not Working Issue [Fixes]
- How to Control Soundbar with TV Remote [Step-by-Step]
- How to Program DirecTV Remote to Vizio Sound Bar? [Detailed-Guide]
- Vizio Sound Bar Remote Display Not Working [Guide]
- How to Control Soundbar with Roku Remote? [Updated]
Read also: Best Settings for Samsung Sound bar

Mia Evelyn is a soundbar specialist and she love to test and review different soundbar brands. She shares her neutral and in-depth reviews through the Soundbar Mag.