Vizio sb36512-f6 is a trendy home theatre setup in the market. It gives high-quality audio for music and detailed background effects, and audio clarity for other entertainment like movies.
If you have purchased one or are thinking of it, you might need to look into how you can first set your Vizio soundbar up. It is crucial to put it in an accurate way to enjoy it to the fullest. This article will help you understand the Vizio sb36512-f6 Setup before you first use it.
VIZIO SB36512-F6 Setup
We will see the necessary steps, in detail, that you need to take to set your Vizio setup properly.
Step 1: Select the Right Cable

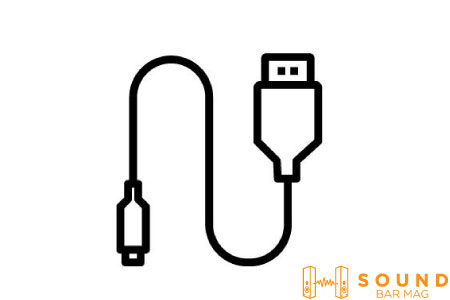
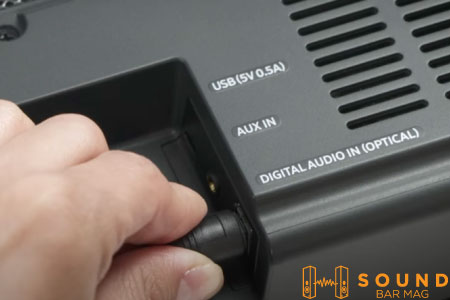
At the back of your soundbar, you shall see the RCA cable, Optical cable, and HDMI cable ports. You need to use one of these to connect your soundbar to audio output. This could be your TV or gaming system. If you have trouble figuring out the difference between the three, please check the user manual.
Out of these three, HDMI cable is the best option since it gives supreme audio quality. It also transmits both audio and video. The second best option is going for the optical cables. Although setting up this soundbar for the first time, we recommend going for optical and not HDMI. To use HDMI, you will need to refer to the Advanced user guide.
Use any of these three to connect your soundbar to the other device. Make sure the other device is an audio output, not an audio input.
Step 2: Use Proper Cables
Make sure the HDMI or Optical cables you are using are in good condition. They should be free of any damage. When you plug them in the ports, make sure the connection is firm and secure.
Step 3: Connect the Power Cable to the Soundbar AC IN
Plug the power cable into the soundbars AC IN. This connection will be at the back of the soundbar. And then plug the power cable into an electrical outlet. If this is the first time setting it up, the soundbar will automatically look for an active input.
You will see LED indications flashing on the soundbar, which confirms that the auto-detection function is on. This only happens the first time to set it up. If you have used your soundbar before, you need to reset it to use this feature again.
Step 4: Connect Satellite Speakers to the Subwoofer
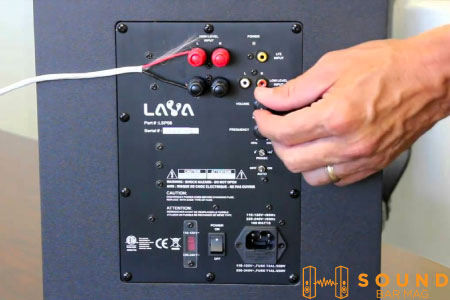
You will receive satellite speaker audio cables to connect the satellite speakers to the subwoofer. It is simple since you need to use lines that match colors with the ports. The blue color is for ports on the left surround, and grey Is for the right surround.
Step 5: Power on the Subwoofer

To power on the subwoofer, you need to connect the woofer to a power cable. Plug the power cable into a power outlet. When you see the LED light on the soundbar glow, you can ensure that the subwoofer is powered on. You can then link it to the soundbar.
Step 6: Put Battery in your Remote

You need to remove the battery of your remote gently. Insert the batteries and then put them on the back. Test the remote on the soundbar. Press the power on button and power off button and make sure the soundbar follows. To switch between audio sources, use the INPUT button on the remote. Once you press it, you can select the device you want as the audio source.
Step 7: Proper Placement of the System
It would help if you placed the soundbar, subwoofer, and satellite speakers properly to make the most out of the experience. Consider placing the soundbar below the tv. This will give a feeling of joint visual and audio. You can mount it to the TV as well if needed. But make sure there is space between the bottom of the TV and the soundbar.
You can place the subwoofer beside the couch or sofa that usually sits in front of the TV. The left and right satellite speakers can be placed in the adjacent corners to get surround sound. Having a flat roof will give the ideal sound experience. The height of the room and be anywhere between 7.5ft to 12ft.
Conclusion
Vizio sb36512-f6 is a fantastic home theatre set up to spice up your home entertainment. This article explains the Vizio sb36512-f6 Setup. The setup might seem complicated at first, but it is relatively simple.
You need to use the proper ports and plugs and set all components in appropriate positions in the room. Once you have set the theatre up, you can check into the other advanced settings like exploring the different connectivity modes or using your smartphone as the remote.

Mia Evelyn is a soundbar specialist and she love to test and review different soundbar brands. She shares her neutral and in-depth reviews through the Soundbar Mag.